


Have you ever seen an empty ice cream box and thought about what you could make with it? Upcycling can change that plain box into something helpful or pretty. You help the Earth when you use packaging again instead of throwing it away. Here is how packaging stacks up:
| Packaging Type | Environmental Impact | Reusability | Recycling Potential |
|---|---|---|---|
| Disposable (EPS) | Lighter, easier to recycle | Not for reuse | Can be made into new things or used for energy |
| Reusable (VIP boxes) | Keeps things cold longer and lasts longer | Can be used again for 1.5 years (180 times) | Can be recycled after you finish using it |
These ideas are simple for families and great for anyone who likes DIY projects. You might be amazed by what you can make!
Key Takeaways
- Transform empty ice cream boxes into fun toy storage. Let kids decorate their boxes to make organizing toys enjoyable.
- Use ice cream boxes as craft organizers. Sort art supplies into labeled boxes to keep your creative space tidy.
- Create a unique gift box from an ice cream container. Wrap it in colorful paper and fill it with treats for a personal touch.
- Make a handy bird feeder from an ice cream box. Cut a hole for seeds and hang it outside to attract feathered friends.
- Turn an ice cream box into a mini trash can. Decorate it with duct tape for a fun and eco-friendly waste solution.
Storage Ideas

Toy Storage
You probably have toys scattered around your home. An ice cream box can help you keep things tidy. Just clean out the box, and you have a simple container for action figures, building blocks, or small dolls. Kids love to decorate their own storage. Grab some markers, stickers, or even colorful tape. Let your child add their name or draw their favorite cartoon character on the lid. This makes the box special and easy to spot on a shelf. You can stack a few boxes to sort different types of toys. No more searching under the couch for missing pieces!
Craft Organizer
Do you enjoy arts and crafts? An ice cream box works great for holding supplies. You can sort crayons, markers, glue sticks, and scissors into separate boxes. If you want a more stylish look, try spray painting the outside or wrapping it in fabric. Add labels to each box so you know what’s inside. This keeps your craft area neat and saves time when you want to start a new project.
You can also use these boxes for other household items. Here are some ideas:
- Store single servings of leftovers, like spaghetti or roast chicken.
- Keep pet food fresh and easy to reach.
- Hold fruits and vegetables in the fridge.
- Collect spare change as a coin holder.
- Organize small decorations or desk supplies.
An ice cream box is more than just packaging. With a little creativity, you can turn it into a handy organizer for almost anything in your home.
Ice Cream Box Crafts
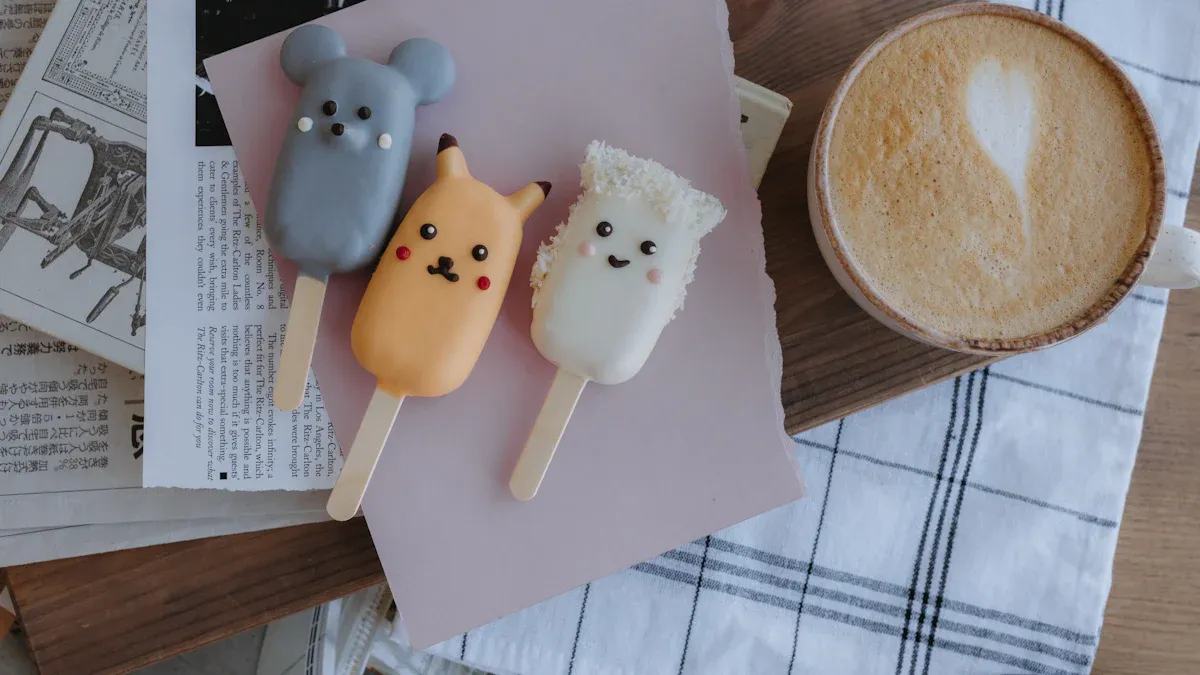
Piggy Bank
Do you want a fun way to save your spare change? Try making a piggy bank from an ice cream box. Start by cleaning and drying the box. Cut a small slot in the lid for coins. You can paint the outside with bright tempera paint. Neon colors look great and are safe for kids. Add some glitter glue for sparkle. If you like, glue on colored paper to make shapes or patterns. Stickers work well, too. Draw a face or animal features to give your piggy bank some personality. You might even add googly eyes or a pom-pom nose. Saving money feels more exciting when you use something you made yourself!
Tip: Let each family member decorate their own piggy bank. You can have a contest to see who saves the most coins.
Gift Box
A homemade gift box always feels special. You can turn an ice cream box into a unique package for birthdays or holidays. First, wipe the box clean. Wrap it in colored paper or fabric. Use glue that dries clear so your box looks neat. Decorate with ribbons, bows, or even hand-drawn designs. Tempera paint works well for adding names or messages. Glitter glue adds a festive touch. You can fill your box with candy, small toys, or homemade treats. Your friends and family will love the extra effort.
- Materials you can use for decorating:
- Tempera paint (non-toxic, safe for kids)
- Glitter glue for sparkle
- Colored paper for wrapping or accents
Making crafts from an ice cream box lets you get creative and helps the planet. You turn something simple into a keepsake or a thoughtful gift.
Gardening
Planter
You can turn an empty ice cream box into a handy planter for your favorite plants. This project works well if you want to grow herbs, flowers, or even small vegetables right at home. Start by cleaning the box and making a few small holes in the bottom for drainage. Good drainage helps keep roots healthy and prevents soggy soil. Fill the box with potting mix and plant your seeds or seedlings. Place your new planter on a sunny windowsill or balcony.
Tip: Use a non-toxic ice cream box to make sure your plants stay safe and healthy.
How do ice cream containers compare to regular gardening pots? Here are some things to think about:
- You can use ice cream containers for growing vegetables, just like clay or plastic pots.
- The box needs to be big enough for roots to spread out.
- Drainage holes are important for any container garden.
- Always check that the material is safe for plants.
You can decorate your planter with paint or stickers. Add a label with the plant’s name. Your homemade planter will look great and help you reuse something you already have.
Seed Starter
If you want to start a garden from seeds, an ice cream box makes a perfect seed starter. Fill the box with seed-starting mix and plant your seeds about half an inch deep. Keep the soil moist but not soaked. Place the box in a warm spot with plenty of light. When the seedlings get big enough, you can move them to a bigger pot or your garden outside.
You can use a marker to write the date and type of seed on the side of the box. This helps you remember what you planted and when. Watching seeds sprout is exciting and teaches you how plants grow from the very beginning.
Bird Feeder
Hanging Feeder
You can turn an empty ice cream box into a hanging bird feeder that brings birds right to your window. Start by cleaning the box and cutting a hole in one side, big enough for birds to reach the seeds. Punch two holes near the top and thread a sturdy string through them. Now you can hang your feeder from a tree branch or a hook outside your window.
To help your feeder last longer outdoors, try adding a rain protection cover. This keeps the seeds dry, even on rainy days. You can use a plastic lid or a piece of waterproof material for the cover. Birds love a dry spot to eat, and you will enjoy watching them visit every day.
Tip: Hang your feeder where you can see it from inside. You might spot cardinals, sparrows, or even blue jays stopping by for a snack.
Table Feeder
If you have a porch or a backyard table, you can make a simple table feeder with an ice cream box. Just fill the box with birdseed and set it on a flat surface. Birds will hop right up and help themselves. To keep things tidy, add a bird seed catcher tray under the box. This catches any seeds that spill and makes cleanup easy.
You can decorate your feeder with paint or stickers. Try drawing some birds or flowers on the outside. This makes your feeder look cheerful and bright. Place your table feeder in a quiet spot, and soon you will have feathered visitors all day long.
- For weatherproofing your bird feeder, consider:
- Bird feeder rain protection cover
- Bird seed catcher tray
Watching birds eat from a feeder you made feels rewarding. You give birds a treat and reuse something that might have ended up in the trash.
Trash Can
Duct Tape Can
You can turn an empty ice cream box into a sturdy trash can with just a roll of duct tape. Start by cleaning the box and drying it well. Next, wrap the outside with colorful duct tape. This step makes the box stronger and gives it a fun look. You can use one color or mix a few for a cool pattern. Duct tape also helps protect the box from spills and sticky messes.
Place your new trash can in your bedroom, bathroom, or even your car. It works great for small bits of paper, snack wrappers, or tissues. The lid from the ice cream box can act as a cover to keep things tidy. If you want, cut a hole in the lid for easy tossing. You get a mini trash can that looks good and keeps your space neat.
Tip: Try using patterned duct tape for a unique design. You can match your room or show off your favorite colors!
Mini Bin
Need a small bin for your desk or nightstand? An ice cream box makes the perfect mini bin. It fits in tight spaces and holds just enough trash so you don’t have to empty it all the time. The plastic material from most ice cream boxes is tough and lasts a long time. You don’t have to worry about it breaking or leaking.
Check out how ice cream boxes stack up as mini trash cans:
| Feature | Description |
|---|---|
| Eco-Friendly Waste Disposal | Designed for efficient waste management with a 50L capacity, featuring a rolling cover mechanism for hygienic and convenient use. |
| Material Technology | Made from eco-friendly plastic material, ensuring sustainability while maintaining durability. This plastic is REACH-certified, surpassing basic environmental standards. |
| Rolling Cover Design | Minimizes odor leakage and improves hygiene compared to traditional lids. |
| Technical Breakthroughs | Eco-Friendly Material: Reduces environmental impact while maintaining durability. REACH Compliance: Exceeds EU safety standards for chemical resistance. |
You get a bin that controls odors better than most small trash cans. The rolling cover design keeps smells inside and helps your room stay fresh. Plus, you help the planet by reusing something you already have. Making a mini bin from an ice cream box is a smart, eco-friendly choice.
Ice Packs
Injury Pack
You can turn an empty ice cream box into a handy injury pack. This trick works well when you need something cold for a bump or bruise. Start by cleaning the box and drying it. Fill the box about halfway with water. For extra flexibility, add a little rubbing alcohol—about one part alcohol to three parts water. The alcohol keeps the pack from freezing solid, so it stays soft and molds to your body.
Seal the lid tightly. If you want to be extra safe, put the box inside a zip-top bag to prevent leaks. Place your homemade pack in the freezer. When you need it, just grab it and wrap it in a towel before putting it on your skin. The cold helps reduce swelling and pain.
Tip: Label your ice pack so no one mistakes it for food. You can use a marker or a sticker.
This DIY injury pack saves you money and helps you reuse something you already have at home. You can make a few and keep them ready for sports, playground accidents, or even headaches.
Cooler Pack
You can also use ice cream boxes as cooler packs for picnics or lunchboxes. Fill the box with water, seal it, and freeze it overnight. The next day, place the frozen box in your cooler or lunch bag. It keeps your food and drinks cold for hours.
Here are some reasons to try this idea:
- You save money by not buying store-bought ice packs.
- The box is big enough to keep a large area cool.
- You can reuse the box many times.
Note: If you want a longer-lasting cold pack, add a pinch of salt to the water before freezing. Salt lowers the freezing point, so the pack stays cold longer.
With a little creativity, you turn a simple ice cream box into a useful tool for first aid and outdoor fun. Give it a try the next time you finish your favorite ice cream!
First Aid Kit
Medical Storage
You can turn an empty ice cream box into a handy first aid kit for your home. The box is just the right size for storing medical supplies in one place. You do not have to search for bandages or ointment when you need them most. Just grab your box and you are ready to help.
Start by cleaning the box and drying it well. You can decorate the outside with a red cross or a first aid sticker. This helps everyone spot it quickly. Inside, you want to keep the most important items. Here is a list of what you should include:
- Bandages in different sizes for small cuts and scrapes.
- Butterfly closures for closing bigger wounds.
- Sterile dressing pads to stop bleeding.
- Non-adherent dressings for burns or blisters.
- Gauze roll to hold dressings in place.
- Adhesive tape to secure everything.
- Multi-use tool with scissors and a knife.
- Tweezers for removing splinters or ticks.
- Trauma scissors for cutting tape or clothing.
- Digital thermometer to check for fever.
- Malleable splint for supporting injuries.
- Irrigation syringe for cleaning wounds.
- Safety pins for fastening slings.
- Antiseptic towelettes for cleaning skin.
- Pain relievers like acetaminophen.
Tip: Use small zip bags or containers inside the box to keep things organized and easy to find.
Travel Kit
You can also use an ice cream box as a travel first aid kit. The box fits easily in your car, backpack, or suitcase. When you go camping, hiking, or on a road trip, you will feel safer knowing you have supplies close by.
Pack only what you need for your trip. Add extra bandages, allergy medicine, or sunscreen if you plan to spend time outdoors. You can even tuck in a small flashlight or whistle for emergencies. Label your travel kit so everyone knows what it is.
A homemade first aid kit saves you time and worry. You stay prepared for life’s little surprises, and you give new life to an old ice cream box.
Party Uses
Snack Bowl
You can turn an empty ice cream box into a fun snack bowl for your next party. Just clean the box well and let it dry. Now you have a container that holds popcorn, chips, or candy. Kids love grabbing snacks from a colorful box. You can decorate the outside with stickers, markers, or even wrap it in party-themed paper. This makes your snack table look bright and cheerful.
If you want to serve snacks safely, always check that your container is clean and dry before you fill it. For cold treats like fruit or ice cream, the box works well because it was made to hold dairy. You can even use several boxes to separate different snacks. This keeps things organized and easy for guests to grab what they want.
Tip: Add a scoop or small tongs so everyone can serve themselves without touching the snacks.
Favor Box
Party favors make any celebration special. You can reuse an ice cream box to create a unique favor box for your guests. Cut the box into smaller sections or use the whole thing for bigger gifts. Decorate each box with ribbon, paint, or stickers to match your party theme. Fill them with small toys, candies, or homemade treats.
Food-grade containers are essential when dealing with any food item. They are specifically designed for food storage, manufactured from materials that don’t adversely affect food quality or safety. Ice cream containers need to be food grade because of their dairy content, as milk is sensitive to environmental conditions and can spoil quickly if in contact with certain materials.
When you use a container for party favors, you want to keep everyone safe. Here are some things to remember:
- Reusing ice cream containers for food storage is discouraged due to contamination risks.
- Chemicals from the packaging can migrate into food, especially with hot or greasy items.
- It is recommended to use proper freezer-safe containers like plastic or heat- and cold-resistant glass.
If you plan to put food in your favor box, stick to wrapped treats or non-food items. This way, you keep your guests happy and safe. Your homemade favor boxes will stand out and show you care about the details.
Bag Handles
Ribbon Handle
You can turn your ice cream box into a cute tote by adding a ribbon handle. Start by picking a strong ribbon in your favorite color or pattern. Measure the length you want for your handle. Cut the ribbon so it fits your hand or arm comfortably.
Next, use a hole punch to make two holes on opposite sides near the top of the box. Thread the ribbon through each hole and tie a big knot on the inside to keep it from slipping out. If you want extra strength, add a dab of glue to the knots. Now you have a simple handle that makes your box easy to carry.
Tip: Try using two ribbons for a double handle. Mix and match colors for a fun look!
A ribbon handle works great for gift boxes, party favor containers, or even a small craft tote. You can decorate the box with stickers or paint to match the ribbon. Your new bag will look bright and cheerful.
Fabric Handle
Fabric handles give your ice cream box a sturdy, reusable upgrade. Find a strip of fabric, like an old t-shirt or leftover sewing scraps. Cut the fabric into a long strip, about two inches wide. Fold the strip in half and twist it for extra strength.
Punch two holes in the box, just like with the ribbon handle. Thread the fabric through each hole and tie a tight knot inside. For a softer grip, braid three strips together before attaching them.
- Why choose fabric handles?
- They last longer than ribbon.
- You can wash and reuse them.
- They feel soft and comfortable in your hand.
You can even add buttons or beads to the handle for a special touch. Your upcycled box now works as a lunch tote, storage bin, or gift bag. Try different fabrics to match the season or your mood!
Home Decor
Painted Box
You can turn an empty ice cream box into a beautiful piece of home decor with just a little paint and imagination. Start by washing and drying the box. Pick your favorite colors and grab some acrylic paint. You might want to use a sponge or brush to create different textures. Try painting stripes, polka dots, or even a simple landscape. If you want a shiny finish, add a layer of clear craft sealer when the paint dries.
Many people love to use painted boxes as decorative storage. You can keep your jewelry, hair ties, or even small toys inside. Some interior design blogs suggest adding mica flakes, jute cord, or yarn for extra style. These materials give your box a unique look and make it stand out on a shelf or dresser.
Tip: Let your creativity shine! Invite friends or family to join you for a painting party. Everyone can make their own design.
Centerpiece
A homemade centerpiece can brighten up any table. You can use an ice cream box as the base for a floral arrangement. Paint the outside to match your room or the season. Fill the box with fresh or faux flowers. Wooden ice cream churns are popular for this project, but any sturdy box works well.
Here are some ideas for your centerpiece:
- Arrange colorful flowers for a spring or summer look.
- Add pinecones and berries for a cozy winter vibe.
- Use ribbons or lace to wrap around the box for extra charm.
You can place your centerpiece on the dining table, coffee table, or even a windowsill. Guests will notice your creativity and the way you reused something simple. Making your own decor saves money and gives your home a personal touch.
You can turn empty ice cream boxes into something amazing. Try out these creative ideas at home and see what you can make. Got your own upcycling tip? Drop it in the comments below!
Every time you reuse a box, you help the planet and have fun with DIY projects. Small changes add up. You make your home unique and help build a greener world. 🌱
FAQ
Can I use any type of ice cream box for these projects?
You can use most ice cream boxes, but make sure they are clean and dry. Plastic and sturdy cardboard work best. Avoid boxes with strong odors or stains. If you want to use them for food, check that they are food-safe.
How do I clean an ice cream box before reusing it?
Wash the box with warm, soapy water. Rinse it well and let it air dry. If the box smells like ice cream, sprinkle a little baking soda inside and leave it overnight. That helps remove any leftover scent.
Are these projects safe for kids?
Most of these ideas are safe for kids with adult help. Use child-safe scissors and non-toxic glue or paint. Always supervise young children when they use sharp tools or small decorations.
Tip: Let kids decorate their boxes with stickers or markers for extra fun!
What should I do if my ice cream box gets wet or damaged?
If your box gets soggy or starts to fall apart, recycle it if possible. For plastic boxes, wipe them dry and reuse them. Cardboard boxes work best for dry storage or crafts, not for holding liquids.
See also
What ice cream brands actually use real ingredients
Top Reasons Italian Ice Cream Is Better for You Than Regular Ice Cream